Register a mailcow
Notice
This guide applies exclusively to mailcow: dockerized versions, where you have full administrative access via the WebUI.
After purchasing a mailcow SAL through our customer portal, you can link your mailcow instance with this license. Follow the steps below:
Instructions
-
Log in to the mailcow UI
Log in as an administrator to the mailcow web interface. -
Find the GUID of your mailcow instance
Navigate to System -> Information. At the bottom, you will find the section GUID & License:

Note down the randomly generated GUID of your mailcow instance. -
Log in to the Servercow customer account
Visit the Servercow Customer Portal and log in. -
Manage mailcow SAL
In the Dropdown select My Products:
Then you will see your active products including your mailcow SALs.
Click on View for a license:

-
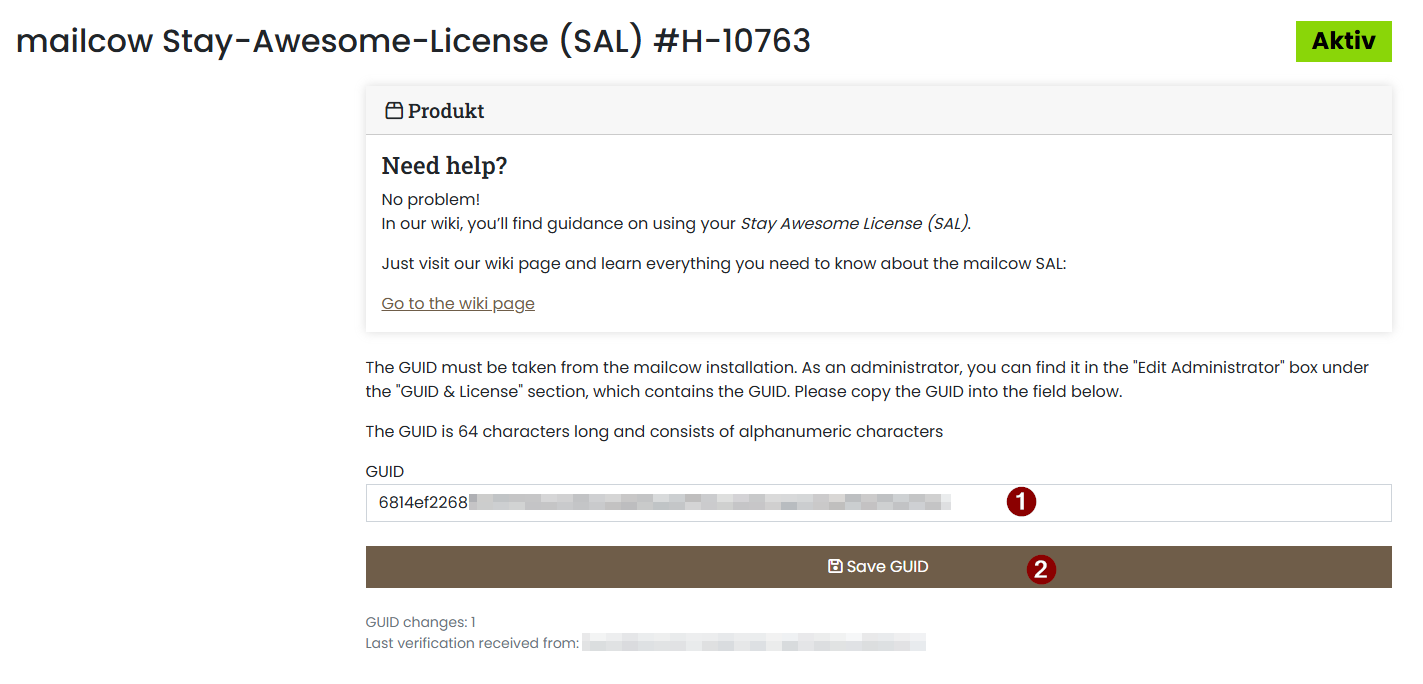
Enter GUID and save
Enter the GUID noted in step 2 into the registration form and click Save GUID:
-
Verify GUID in the mailcow UI
Switch back to the mailcow UI and click Validate GUID against license server. The status should update, and your customer number, service ID, and Moo Level (donation tier) will be displayed:

Example of a validated mailcow SAL -
Completion
🎉 Congratulations! Your mailcow SAL is now successfully linked to your mailcow instance.