User Management
Preface
The User Management feature in our customer portal allows you to manage and control access to your customer account. Here you can add additional Servercow customers who are also allowed to access your account, as well as define their permissions.
This wiki page guides you through the steps to manage User Management in our customer portal.
Important
To grant another Servercow customer access to your account, you need their email address that is linked to their Servercow customer account.
If no Servercow customer account exists for the email address, access cannot be granted.
Managing Access Groups
-
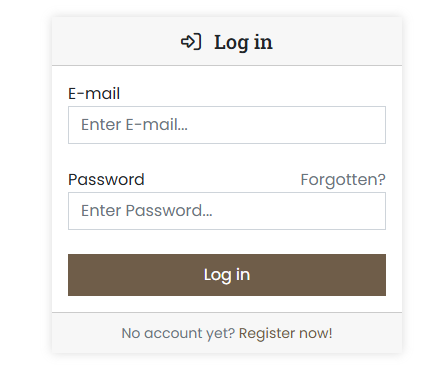
Log in to the customer portal at https://cp.servercow.de with your credentials:
-
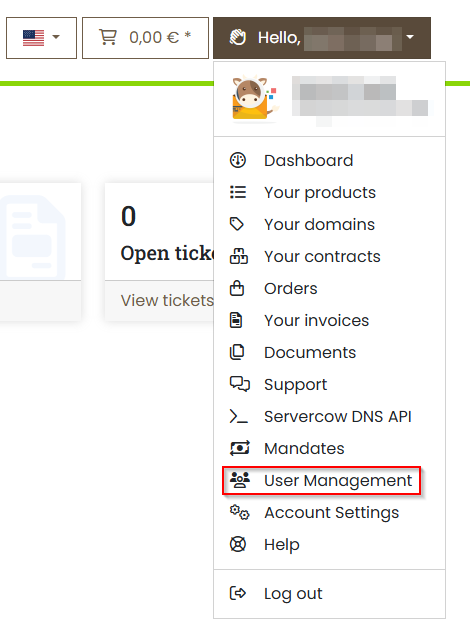
Once logged in, click on the button with your customer name in the top right and select User Management from the dropdown:
-
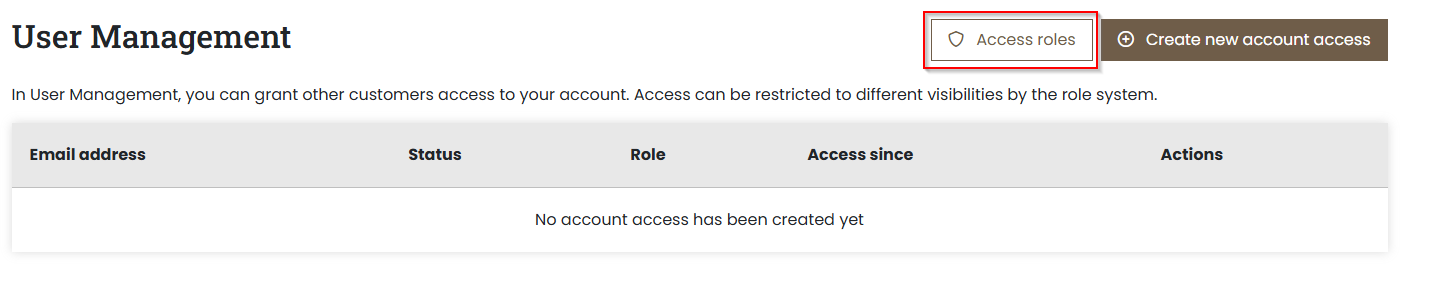
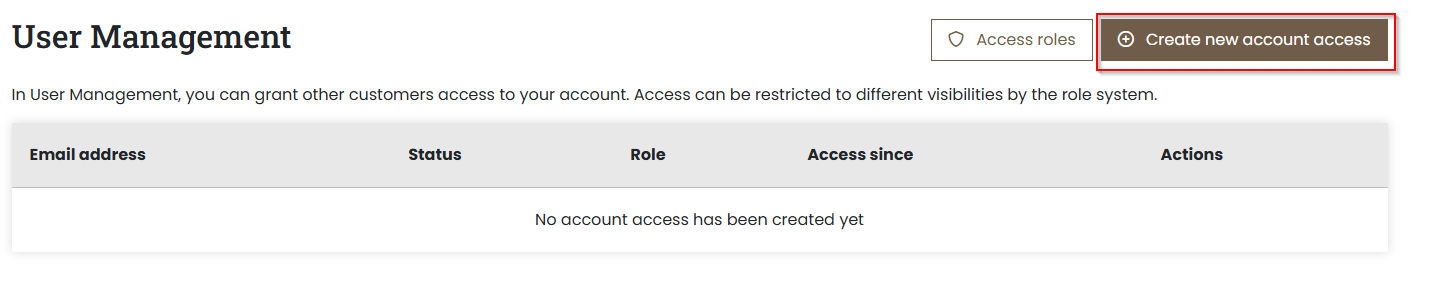
You are now on the User Management page. Here you see an overview of all accesses you have created. Click on the Access Roles button to view the access roles available for your account:
-
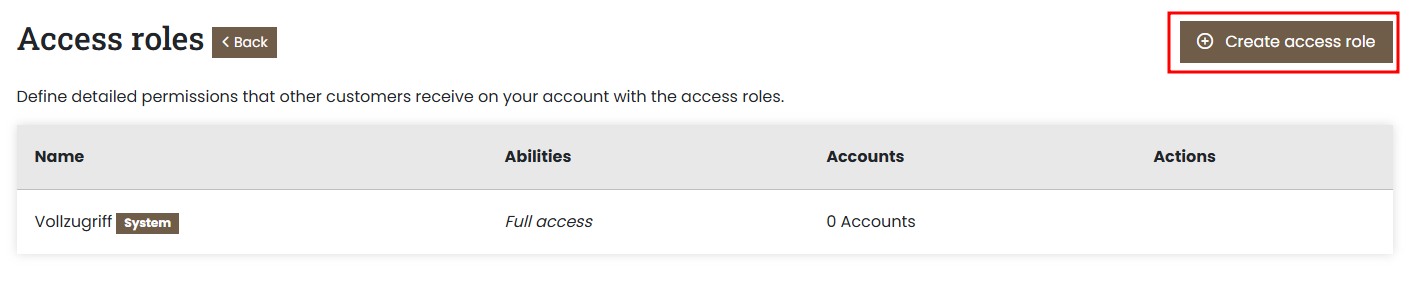
By default, the customer portal creates the Full Access role, which includes all permissions. You can add more roles by clicking on the Create Access Role button:
Notice
Vollzugriff means Full Access in German and is the default access role with all permissions.
-
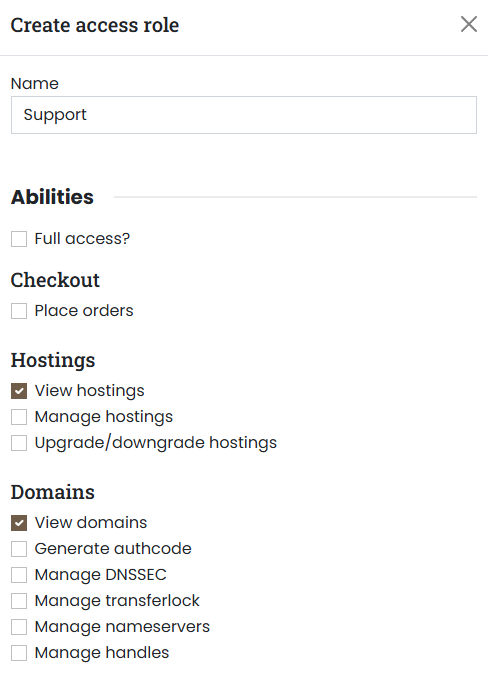
A form will now open where you can enter the name of the new role and select the desired permissions. Then click on Create Access Role to save the role:
Note
The screenshot shows only an excerpt of the available permissions. You can select additional permissions as needed.
The access roles you create can be edited or deleted at any time by clicking on the corresponding buttons next to the role.
Caution
Before deleting an access role, make sure that none of your granted User Managementes use this role. Otherwise, the affected users could lose access to your account.
Managing User Accesses
-
Log in to the customer portal at https://cp.servercow.de with your credentials:
-
Once logged in, click on the button with your customer name in the top right and select User Management from the dropdown:
-
You are now on the User Management page. Here you see an overview of all accesses you have created. Click on the Create new account access button to add a new User Access:
-
A form will now open where you can enter the email address of the Servercow customer to whom you want to grant access to your account. Then select the desired access role from the dropdown menu and click on Create new account access to save the access:

Attention
Make sure that the entered email address is correct and has an active Servercow customer account. Otherwise, access cannot be granted.
If the invited customer does not yet have a Servercow customer account, they can register at https://cp.servercow.de/register.
After registration, the User Access will be automatically activated.
The User Accesses you create can be edited or deleted at any time by clicking on the corresponding buttons next to the access.
Switching Accounts
If you have been granted access to another customer account as an additional user, you can easily switch between your own account and the accounts you have access to.
-
Log in to the customer portal at https://cp.servercow.de with your credentials:
-
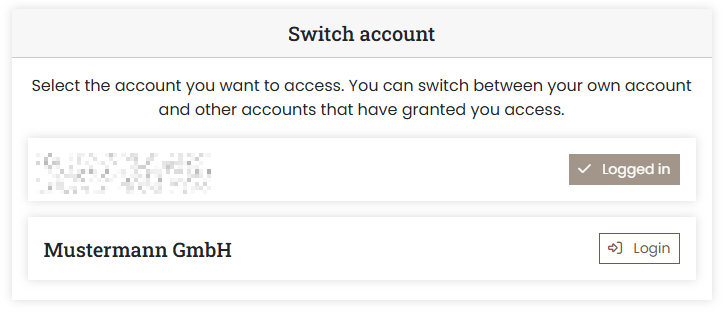
Once logged in, click on the arrow icon "Switch Account" in the top right next to the dropdown with your customer name:

-
A menu will open showing all accounts you have access to. Click on the desired account to switch to it:
-
You are now in the selected customer account and can use all functions and services allowed by your assigned access role.
Note
To return to your own account, click on the arrow icon "Switch Account" again and select your own account from the list.